And then there was the sag. Since the cushion resembled loosely a potato sack, they lost their shape way before you ever leaned back on them. And got worse from there.
We tried overstuffing them to cure the problem, and ended up with giant vienna sausages of cushions that ricocheted you across the room if you sat down too enthusiastically. And no couch room for your butt. Both not good things. I set out to make some internal cushions, to hopefully hold the stuffing in a more rectangular shape, with the motto "it can't possibly make it worse". May be at least smooth it out, so it doesn't look like I store vegetables in them.
Mr Snork inspected a lone couch cushion we found at Salvation Army and informed me we needed baffle channels in the internal cushions. It would also help if we had 4 giant trash bags of premium down as opposed to JoAnn's grade stuffing, but sometimes finer things, like, say, AG dolls, or down of any grade are just out of my reach. Still, their stuffing is better than a giant piece of foam, cut to shape (my back up plan), so I crossed my fingers and sewed the cushions out of double layers of some muslin I have about 200 yards of around.


The homemade cushions in background seem to retain their cushion shape, lean back against the couch appropriately, and generally behave in a way a good cushion might.
I made the internal cushions 3" longer than that microfiber cover, that seems to fill them out nicely, following the Salvation Army cushion measurements. I have no idea how channels are regularly sewn, so I made the top seam, on the wrong side, made the 3 channels, 7" each, and the remaining seams on the cushions are sewn on the outside. The top seam makes the top of the cushion round, as opposed to boxy, and that way molds into whatever top seams the cushion cover has. This is how the commercial cushion was made, so I copied it.
I was a little in love with the serger for finishing the outside seams. I don't know that it's necessary for the inside cushion, what with it never seeing the light of day, ever, but it pleased me anyway. I left one side machine basted closed, in case I want to get in there and add/take away/readjust stuffing.
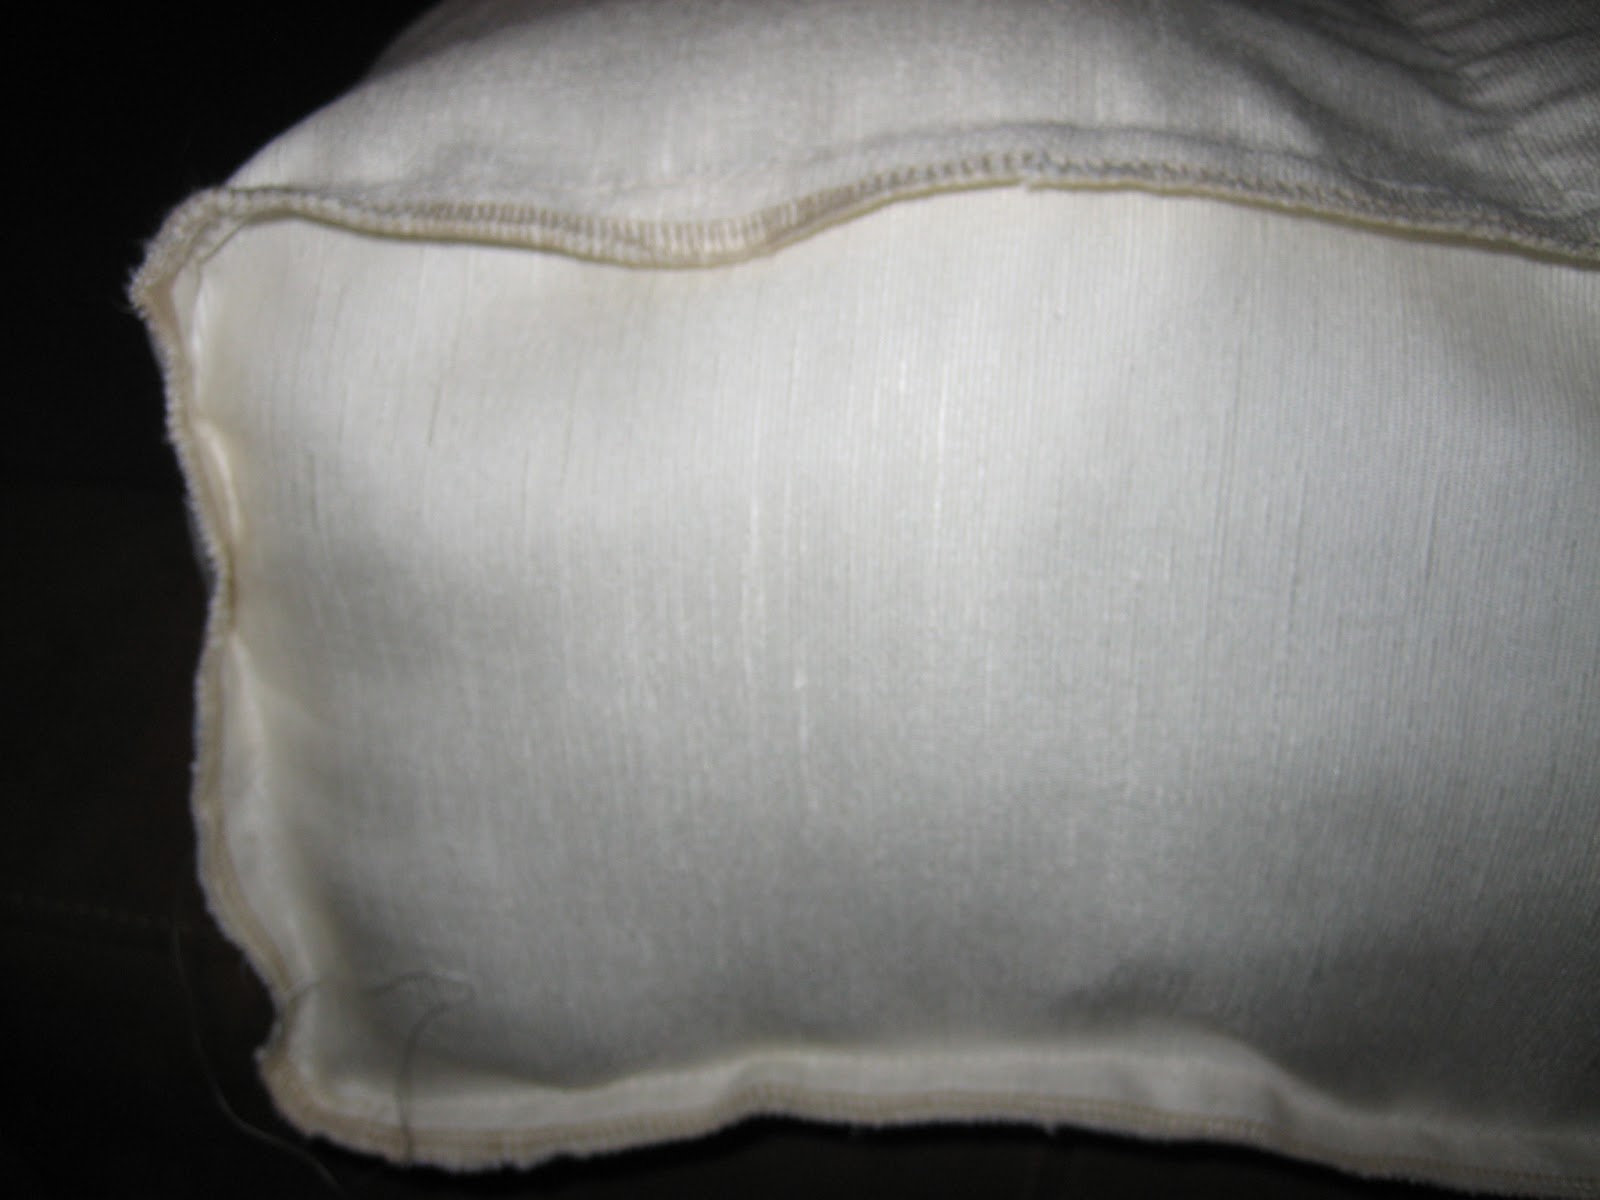
The original cushions were 41" by 22" by an unspecified width, may be 4".. (shapeless, and all) My inserts were cut at 43" x 21.5 x 6.5, with half inch seam allowances on all sides. Since the top seam is traditional "turn inside out" type, to lay flat at tops of cushions and not show, I added 3.25" on each side of the cushion to the top, plus seam allowance, to make room for the ~6.5 width. The channels are 6.5" each, cut at 7.5". (I serged these too, for fear they'd unravel indignantly at the weight of the crap I was making them hold, and I'd be back where I started. In retrospect, probably not a valid concern. The insert looks a lot bigger than covered cushions, but I think it needs to be to fill it out right.

After I had already measured out and cut my cushion parts, I read on an upholstery message board somewhere, that they make their channels wider than the cushion, so they don't 'pull in'. But the same people also fill them with down and wrap them with down, so they are clearly overachievers.
Mr Snork went over with nicer bits of batting over the cushion, to smooth it out. It took a lot less lumpy stuffing to full these cushions, then it did to fill the cushion cover originally. I still have 3 giant trashbags of lumpy stuffing that I can't seem to part with. There's GOTTA be something else I can sew. Backrest pillow? Body pillow.. Floor pillow? There must be something, and it will occur to me the second I throw away all the batting, I just know it. If all else fails, I can spread it around the Xmas tree, snow-like, and drive Mr Snork mad for a couple weeks. So, if you're local and need a lot of poor quality wadding.. do let me know.

I am pretty pleased with the outcome. And with the fact that no additional funds had to be added to the couch's original cost. (Even my serger thread was a yard sale box find) Although, for a Pottery Barn look (ha) I would probably use some nice, stiff duck canvas. I think the channels would show less, and the lumpy factor in the stuffing wouldn't matter at all. But then we get into that whole, 'buy a $90 Craigslist couch, spend $200 'working on it' phenomenon, and anyway, at the rate I sew, there's no way I'll ever use up the 8 football fields of muslin I once got at Goodwill for $5, unless I implement it every chance I get.

It's been about two weeks between this project and the time it took me to post this, and I am happy to report the couch cushions are behaving very nicely. I also occured to me I have a bolt of thick curtain interlining, that I could 'wrap' the inside cushions with to get rid of any left over lumpyness, but I'm a little too lazy for revisions like that.
Wow I admire you, I would never want to take on a project like this XD.
ReplyDeleteI am thinking about doing this to my sofa cushions. Same problem. Im trying to figure out the directions. Do I make three individual box compartments then stitch them together?
ReplyDeleteI am thinking about doing this to my sofa cushions. Same problem. Im trying to figure out the directions. Do I make three individual box compartments then stitch them together?
ReplyDeleteHi,
DeleteSorry for the late reply -
The way I sewed them was to cut 2 identical front and back pieces. Cut 2 strips, the width and the length of the cushion (the channel "floors". And another strip, for the two sides and the bottom of the cushion. Sew the top seam together. Turn the seam to inside.
Then, on the inside, place a channel strip where you want the first TOP channel to be, and stitch parallel to the top seam. With the seam allowance laying toward the bottom of the cushion.
After this, place the other side of the channel strip against the other wall of the cushion, same distance from the top seam as the other side. Laying the seam toward the bottom again, stitch again parallel to the top seam. This will form a tube/channel on top, open on both sides.
You do the same thing for the second channel. Drawing lines where you want channels to be is helpful, so you don't have to measure again.
After the two channels, you take the longer strip, and stitch all the way around, closing one side of the cushion and bottom. This will leave you with a flap for the remaining one side, and three channel openings.
I just stuffed the cushion at this point, and whipstitched the remaining flap closed.
You can also make that third side a separate panel and insert a zipper in it.
I figured I would just undo the stitching and stuff more/less as needed.
For what its worth, the couch held up for a couple years after this post, and I recently resold it on Craigslist for more than I bought it for, because we needed a smaller couch. The cushions held up fabulously.
I hope the instructions make sense, if you have any questions, shoot me an email - kuzyenka@gmail.com
Cheers and good luck with you couch!!
thank-you. i just unzipped my lumy cushions on my couch and realized they are filled with the same horrible batting. I was thinking about making cushions like you did but wasn't sure how to go about it. Thanks for the guidance. Much apreciated
ReplyDeleteThank you for the wonderful instructions. I did this and it worked beautifully, and I'll get a couple more years out of the couch!
ReplyDelete