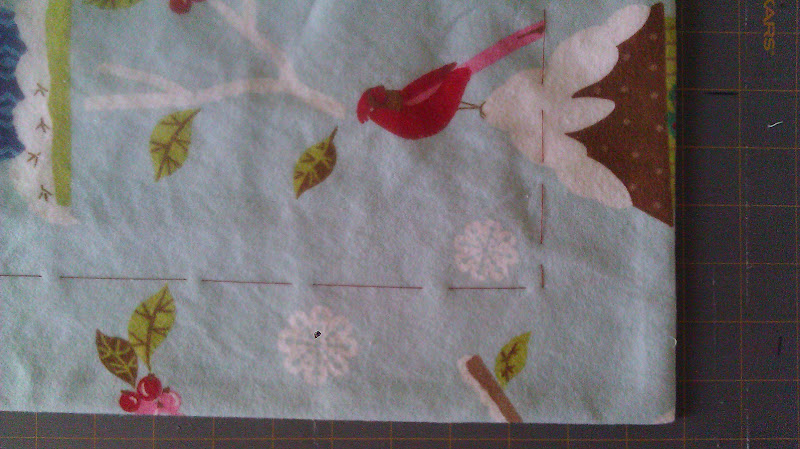
My latest project, despite of the incredible month+ long heat wave we've had, has to do with flannel. I want winter so badly to come, I am planning my 'winter bedding' while it's 105' outside. To that end, LAST winter I stalked some Company Store flannel - an adorable birdhouse pattern:

I think it's adorable, anyway. When it arrived, Mr Snork was sure it was for the nursery. He's still holding out hope.
I LOVE The Company Store. They don't send me free stuff or anything, but I have flannel sheets my mom got me years ago, and they're still as new after wash. Those things went through college, and everything. They aren't the only ones who carry high quality flannel, but I also lovvvvvve their patterns. The other day, they came out with penguin flannel.

Pretty sure I'm going to have stalk that in the spring..
By the time I got done stalking their flannel into clearance last time, I was only able to get a duvet cover and a fitted sheet, no shams. BUT, the fitted sheets were on super clearance for $13.99, so I got two. I figured I can easily make pillow cases, or, since Mouse was tiny and the possibility of sewing seemed like light years away, I could just drape the extra sheet over some pillows, until shame would bring me to finally sew them up. Ha.
But, babies grow FAST. And humans get more efficient in taking care of them. And now I have found time to sew. Yay! And even blog about it!! Double yay!
I don't like pillow cases, they seem really asymetrical and weird with one side all open and hanging out, so I made some shams, with 2.25" flanges all around. I have a king bed, so I needed king shams. The standard size of a king pillow is 20 x 36, and after doing some math, I came up with the measurements to cut:
25.5 x 41 - front ( .5 seam + 2.25 flange + 35.5 (or 20) body + 2.25 flange + .5 seam)
25.5 x 11; 25.5 x 36 - back (envelope type french closure). I think I saw it called french somewhere online, don't take my word for it. For the back, I figured in an extra inch for the hem on each piece. You could also make the two back pieces equal, to make the closure in the middle, but I find that harder to wrestle a long pillow into. This makes a finished size of 35.5 x 20, and I could have gone a half inch smaller all around, I like when pillows fill out the shams completely. That was the plan, but then I chickened out and added a half inch to prevent a stubby sham disaster. The seam allowances are a half inch.
I cut away the elastic on my fitted sheet, and ripped the corner seams to make a flat piece, and gave Mr Snork the job of figuring out efficient placement, so I could save enough fabric to make something else:

Mr Snork is really good at this sort of thing. I cut out the pieces, two of each, since I need two shams.
The four back pieces need hems for the envelope closure, so I turned and pressed under a 1/4" raw edge, turned under another 3/4" and top stitched the hem in place, on the right edge of each longer piece, and the left edge of each shorter piece. The birdhouse pattern runs one direction (roof - up), so the hem placement was specific. On a non directional print, you could hem any edge. I basted e v e r y t h i n g. It was awful.

Once the hems are done, I layered the front piece, right side up, the longer back piece, right side down, and the shorter back piece, right side down, in a way that would make an envelope when sewn. I pinned and basted, because I don't want the pieces to shift. There's plenty of material left over in case I make a mistake, but I have high aspirations of making a sleep sack or something adorable for Mouse. She hates being left out, and since she's gracious enough to nap to allow this sort of thing, she needs to be considered.
I also basted closed the envelope opening, once I lined up the pieces with the front, to prevent any shifting there.

I also screwed around a considerable amount of time, matching up the pattern on the back pieces, then I remembered they'll puff out when filled out, and won't match regardless, so that was an hour wasted. Nonetheless, I matched the patterns, and overlapped a further inch. It does look nice in the back, but I'm not sure it was worth the extra effort:

I mean, it's the thing you sleep on, AND it's the back of it. Overkill much?
I sewed all around, with a 1/2" seam allowance. I also surged the edges, but that's probably overkill also. I guess since I anticipate these lasting a lifetime, I'd hate for them to start unraveling from the inside 50-70 years from now. Ha. I clipped the corner to within 1/8" of the corner, turned inside out, tried my best to get pointy corners and pressed all around.
For the flanges, once pressed, I basted the opening closed again (had to open it to turn shams inside out), pinned and basted (again!) 2.25" from edges all around,
I wish I was just good, and didn't have to baste. HOURS wasted.
and then stitched all around, creating a 2.25" border. I measured 2.25" from the needle with a quilting square and stuck a piece of tape on the sewing machine bed, to make sure I stayed at 2.25, even if my basting wasn't perfect. I backstitched at the envelope edges, since that's where most of the stress is on the fabric when inserting pillows. If this was a decorative sham, I'd slip some interfacing into the flanges, to keep them straight, but I didn't want to bother this time around. They're sooo floppy, that I'm tempted to undo the last stitching and stiffen them up..


Since, the weather outside does not permit flannel, and Mr Snork flails MOST dramatically at the sight of it, I can't make up the whole bed in birdhouses yet. But, soon.. HOPEFULLY, soon!! This took 3 evenings, but it should be noted that I'm a really slow sewer, and I was being extra slow, to make them perfect, as if I'd bought them. The basting takes most of the time, but a number of traumatic seam ripping incidents make the basting a necessity for me. 20 minutes basting ensures I don't spend an hour picking out seams.

Mouse approved.

This was my first such project, but I will definately do this again. Even if the shams are available, this might be a more cost effective away to get them.. In this case, $13.99 = two king shams, and a possible adorable baby sleep sack/blanket/nightgown, another standard pillowcase, (or two, I haven't measured). I've also seen some people online doing this with Pottery Barn, and shower curtains - when king shams aren't available, but a shower curtain in the same print is.
The other day, someone on Ebay was selling a matelasse coverlet in the same color and pattern I have, for $37. I THOUGHT about buying it, and sewing ALL the shams, to complete my set since I'm too cheap to spend $59 per sham. But by the time I got done thinking, someone else bought it. UGH. Totally should have. I'm heavily side-eyeing you, Ebay purchaser that ruined my home decoration plans.
Hello! I've been reading all through your sewing posts because I'm trying to bend a Singer Machine 338 to my will (it was my mommom's and I'm too cheap to buy a new machine.) Do you make all of your projects with your treadle and 338? Or did you get a newfangled machine somewhere along the way? I need hope.
ReplyDeleteHi!
DeleteI've had to put the treadle in the garage, so my toddler wouldn't imprint her forehead on the cast iron - so I've been using the 338 exclusively for more than a year now. It's my favorite. I have actually scavenged another 338, just so I can have a back up or for parts. What problems are you having with it?
Have you joined the Vintage Singers Yahoo group? They are SO helpful, and there's a lot of PDF's, etc with all types of info. A lot to take in, but worth it, I go back there every once in a while.
I have a few other machines, but the 338 is conveniently mounted in the table that I use all the time, and I haven't had the need to use anything else. Don't give up!!
I will look for the Yahoo group! I've just been Google searching the 338 and the only useful thing I've found is your blog. Bless my mommom, she saved the original manual, which helps, but the majority of my issues seem to revolve around trying to get good even stitches. The tensioning is kind of a mystery. The machine feeds faster than any machine I've ever used (I grew up with my mom's early-80s Singer, which is much more modern), so it's hard to figure out what's happened until it's over. Does yours go backward? The bobbin on mine freaks out and throws all kind of thread every time I try...
DeleteMine definately goes backward. Can you turn the wheel by hand, while the bobbin cover is open and try and see what is happening when you put it in reverse? When this happens, is the sewing forward function fine - can you get an even line of stitching, and it freaks out in reverse, or does it never stitch properly? Do join Vintage Singers, I can post a question on there for you, but it'll be like playing broken telephone, they always ask more info, but they're pretty good.
DeleteThe one thing I have done with mine is switch out the original pedal, just last week, actually, to a new electronic pedal. The pedal I had was a push button pedal, and the speed was hard to control, between idle hum and full throttle. It also overheated a lot because that's how they're made - they convert unused energy (full throttle minus your operational speed) into heat. The new pedal allows me to control it really nicely, slowly, and evenly - for free motion quilting, for example, which I'm trying to learn.. I got the pedal on advice from Vintage Singers, from SewClassic Blog, and the same blog has instructions on how to rewire the pedals, if that's something that might be useful to you.
As far as the tension, there's a full tension assembly diagram on VS, I have taken mine apart entirely and back together, to make sure everything was there, and to reposition my spring, turns out it was off. I would look at pictures first before taking it apart and see if everything looks the way it should.
Joined the group and made an appointment to take my machine in for service at a local place (consensus seems to be that it needs lots of oiling and taking apart and such and I'm not much of a handywoman...)
ReplyDeleteThanks so much for your advice! I really appreciate it and I look forward to continuing to read your blog. :)
Hi there, I found your website by the use of Google whilst looking for a related topic,
ReplyDeleteyour website came up, it seems to be good.
I have bookmarked it in my google bookmarks.
Hello there, just become aware of your blog thru Google, and located that
it's truly informative. I'm going to watch out for brussels.
I'll appreciate when you proceed this in future. Numerous other people can be benefited from your writing.
Cheers!
Take a look at my blog Ground Beef Tacos